

DATE :
LAST UPDATED:
CATEGORY :
Construction
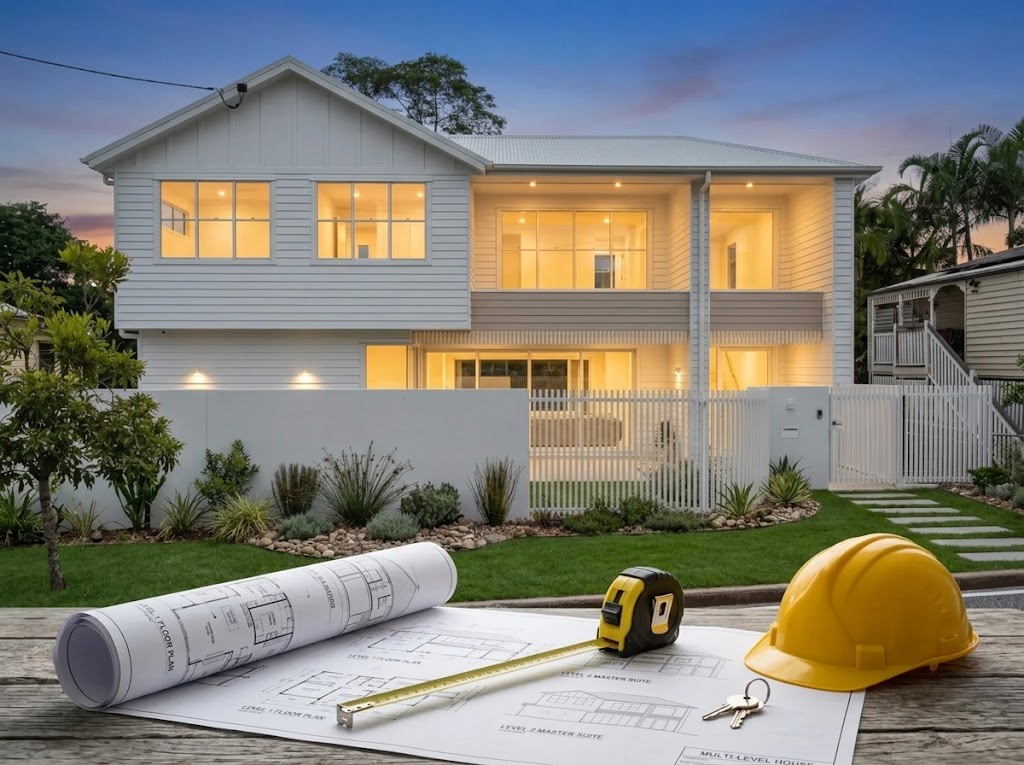
Embarking on a new custom home build is a significant investment. Understanding the construction sequence provides a clear roadmap, allowing you to collaborate effectively with your builder and make informed decisions along the way.
This guide breaks down the entire journey into clear, manageable phases. We focus on providing actionable insights tailored specifically to the unique landscape of Brisbane, from managing sloping blocks and narrow lots to executing complex knockdown-rebuilds. By understanding the 'why' behind each stage, you can partner effectively with your construction team and ensure your project runs as smoothly as possible.
1. Stage 1: Site Assessment and Planning
For any build in Queensland, comprehensive site analysis is vital. For example, a soil test might reveal highly reactive clay, indicating to the engineer that a more robust waffle pod slab is required. Similarly, identifying a council sewer line running through a block during the survey stage allows the design to be adjusted early, avoiding costly relocations later.
Actionable Tips
Commission a Full Survey: Don’t rely on old real estate plans. A new, detailed contour and feature survey is your single source of truth. Ensure it includes neighbouring property details, large trees, and utility connection points.
Get a Geotechnical Report: A soil test is non-negotiable in Brisbane. Ask the engineer to explain the "site classification" and what it means for your foundation costs.
Check for Easements: Ask your surveyor to clearly mark any council or utility easements on the plan. Building over an easement without permission can lead to a demolition order.
Analyse Solar and Breezes: Walk the site at different times of the day. Note where the sun hits in the morning and afternoon, and which direction prevailing breezes come from. This practical knowledge will help you orient living areas and windows for maximum comfort and minimal energy use. To see how this is achieved, you can learn more about the specialist approaches required for building on sloping blocks.
2. Stage 2: Design and Approvals
Following site assessment, the project transitions into the design and approvals stage, one of the most exciting stages of house building where your vision begins to take physical form. This collaborative phase involves architects and designers translating your lifestyle needs, aesthetic preferences, and budget into a set of comprehensive plans. It's a journey from initial concept sketches to detailed construction-ready documents, all while navigating the complexities of council regulations.
This process includes developing the floor plan, elevations, and 3D models, as well as specifying materials and finishes. For a seamless process, a design-and-construct model integrates construction expertise early, ensuring the design is not only beautiful but also buildable and cost-effective. This coordination is critical for preparing the necessary documentation for approval from bodies like the Brisbane City Council and adhering to Queensland Building and Construction Commission (QBCC) standards.
Integrating construction knowledge during the design phase is crucial. A designer might draw a stunning cantilevered balcony, but an experienced builder can immediately advise that the required structural steel could add tens of thousands of dollars to the budget, allowing you to make an informed, practical decision early.
Actionable Tips
Create a Detailed Brief: Before meeting a designer, write a list of must-haves, nice-to-haves, and absolute deal-breakers. How many bedrooms? Do you need a home office? Is an outdoor kitchen essential? This practical document is your guiding star.
Specify Finishes Upfront: Don't leave items as "TBC". Decide on the exact floor tiles, tapware, and paint colours. Vague specifications lead to budget allowances that are often exceeded later.
Plan for Council Timelines: In Brisbane, a standard building approval (BA) can take 4-6 weeks, while a development application (DA) can take 3-6 months. Ask your builder or certifier for a realistic timeframe and factor this into your plans.
Review in 3D: A 2D floor plan can be misleading. Request 3D renders or walkthroughs to understand the real-world scale and flow of the rooms before you sign off on the final plans.
Check Window and Door Schedules: Go through the window and door schedule line-by-line. Confirm sizes, opening types, and glass specifications.
3. Stage 3: Site Preparation and Demolition
Once designs are approved and the project is greenlit, the physical transformation of your property begins. This stage involves preparing the site for construction, a process that ranges from simple clearing to the complex coordination of a full demolition for knockdown-rebuild projects. It is a critical transitional phase that clears the way for the new structure to take shape.
This part of the house building process involves several key activities. These include clearing vegetation, establishing secure site access for heavy machinery, and organising the disconnection of services like power, water, and gas if an existing structure is present. For knockdown-rebuilds, this stage is defined by the methodical and safe demolition of the old home, with a strong focus on responsible waste management and material recycling.
Actionable Tips
Confirm Service Disconnections: Don't assume services are disconnected. Personally verify with providers like Energex and Urban Utilities that your accounts are closed and the physical disconnection is complete. Get it in writing.
Test for Asbestos: For any house built before 1990, it's a legal requirement to have it tested for asbestos before demolition. A licensed removalist must handle any hazardous materials, this is not a DIY job.
Talk to Your Neighbours: Before the bulldozers arrive, have a friendly chat with your neighbours. Let them know the expected timeline for noisy work and provide them with your site manager's contact number. This simple courtesy can prevent many future disputes.
Salvage and Recycle: Before demolition, walk through the old house and identify items for salvage. Old hardwood floorboards, VJ panels, and unique light fittings can be sold or reused, reducing waste and providing a small cost offset for your knock-down and rebuilds in Brisbane.
Install Sediment Control: On a sloping block, your builder must ensure proper sediment control is installed before work starts to prevent soil washing into the street during a heavy Brisbane downpour. You can also explore how to master land preparation for building with key steps.
4. Stage 4: Excavation and Foundation Works
With all approvals secured, the project moves from paper to practice in one of the most critical structural stages of house building: excavation and foundation works. This phase physically prepares the site and lays the literal groundwork that will support the entire home for its lifetime. It involves clearing the building footprint, excavating to the required depths, and installing the precisely engineered foundation system.
The type of foundation used-whether a slab-on-ground, raised timber stumps, concrete piles, or a complex hybrid system-is determined by the engineering design, which is informed by the soil tests and site topography. For Brisbane’s highly variable ground conditions, from reactive clay to sandy soil, getting this stage right is fundamental to preventing structural failure, cracking, and long-term settlement issues.
Key Insight: The foundation stage is where engineering theory meets geological reality. It is a standard industry recommendation to hold a contingency of 5–10% of the foundation cost. Hitting unexpected rock during excavation is common and may require additional rock-breaking machinery.
Actionable Tips for Foundation Works
Review the Engineer's Drawings: Ask your builder to walk you through the foundation plan. Understand why a certain type of slab or footing is specified.
Confirm Under-Slab Plumbing Locations: Before the concrete pour, visit the site and physically see where the pipes for your toilets and showers are stubbed up. It’s your last chance to confirm the powder room toilet is in the right corner.
Check Termite Protection: Verify that the physical termite barrier is installed correctly around all pipe penetrations and the perimeter of the slab, as per Australian Standards.
Request Photographic Records: Ask your builder to take photos of the steel reinforcement and under-slab plumbing before the concrete is poured. This is invaluable proof that the work was done to specification.
5. Stage 5: Framing and Structural Work
Once the slab is cured, the house truly begins to take shape in one of the most visually dramatic stages of house building: the framing. This is where the structural skeleton of the home, made from either timber or steel, is erected. This framework defines the rooms, supports the roof, and provides the structure for all subsequent internal and external finishes.
This stage involves the precise assembly of wall frames, floor joists, and roof trusses according to the architectural and engineering plans. Every element must be perfectly plumb, level, and square to ensure the structural integrity of the entire build. It’s a phase defined by meticulous carpentry and engineering precision, transforming a two-dimensional plan into a three-dimensional reality and laying the groundwork for weatherproofing the structure.
Actionable Tips
Walk Through and "Feel" the Space: Once the frame is up, walk through every room. Does the space feel as you imagined? This is your best and cheapest opportunity to request a minor change, like moving a non-structural doorway 30cm to the left.
Verify Timber Quality: In Queensland's climate, ensure your builder uses appropriate termite-treated timber for structural framing, which is often identifiable by its specific colour grading.
Protect the Structure: As soon as the roof trusses are on, the builder should install the sarking and roof covering. A timber frame left exposed to Brisbane's rain for weeks can lead to swelling and long-term moisture issues.
Plan for In-Wall Items: Before walls are enclosed, confirm the locations for any special in-wall items. This includes blocking for mounting heavy TVs or shelves, and niches in the shower for shampoo bottles.
6. Stage 6: Roof Installation and Weather Tightness
With the frame complete, the next of the critical stages of house building is to secure the structure against the elements. This involves the installation of the roofing system, transforming the open frame into a weatherproof shell. This stage is not just about putting a lid on the house; it’s a highly technical process involving cladding, sarking, flashing, gutters, and downpipes to create an integrated system that protects the home from rain and extreme weather.
This phase begins with laying sarking or a waterproof membrane over the roof trusses, followed by the installation of the primary roofing material, be it tiles, metal sheeting, or another specialised system. Precision is paramount, especially when installing flashings around penetrations like vents and skylights, and along valleys and ridges. Concurrently, gutters and downpipes are fitted to ensure effective water management, directing rainfall away from the building’s foundations.
Actionable Tips
Choose Materials for Local Conditions: For Brisbane, a light-coloured Colorbond roof is an excellent choice as it reflects solar heat, reducing cooling costs. If you are in a bushfire-prone area, ensure all materials and installation methods comply with the required BAL (Bushfire Attack Level) rating.
Check Gutter Fall: Gutters must have a slight, continuous fall towards the downpipes to prevent water pooling, which encourages corrosion. Your site supervisor will verify these levels during installation.
Verify Tie-Downs: In a high-wind area, verify that the roofer has installed the correct number of screws or clips per sheet as specified by the engineer. This prevents the roof from peeling off in a severe storm.
Schedule a Post-Rain Inspection: After the first heavy rain, ask to inspect the ceiling cavity with a torch. Look for any drips or water stains around vents, skylights, and valleys. It’s much easier to fix a small leak now than after the ceilings are plastered.
7. Stage 7: Mechanical, Electrical, and Plumbing (MEP) Installation
Once the home is framed and protected from the elements, the focus shifts from the structural skeleton to its internal systems. This crucial stage, often called the "rough-in," involves installing the intricate network of wires, pipes, and ducts that bring the home to life. It’s a highly coordinated phase where licensed electricians, plumbers, and HVAC technicians lay the groundwork for everything from lighting and power to water supply and climate control.
This phase is a complex dance of tradespeople working within the open wall and ceiling cavities. Electricians run wiring to every power point, light switch, and appliance location. Plumbers install supply and waste pipes for kitchens, bathrooms, and laundries, along with gas lines. Simultaneously, HVAC technicians fit ductwork for air conditioning systems. This work must be meticulously planned and executed according to detailed plans, ensuring compliance with strict Australian Standards before the walls are closed up.
Actionable Tips
Walk Through with the Electrician: Use your electrical plan as a guide, but physically walk through the framed house with your electrician. Mime actions like plugging in a vacuum cleaner or turning on a bedside lamp. This will help you finalise the height and location of every switch and outlet for maximum convenience.
Take Photos of Everything: Before the insulation and plasterboard go on, take photos of every wall from multiple angles. This creates a permanent map of where every pipe and wire is located, which is invaluable for future renovations or even just hanging a picture.
Future-Proof Your Wiring: Think about 5-10 years from now. Ask your electrician to run conduit for a future solar battery in the garage, install an extra data point in the study, and put a power point near the toilet for a potential smart toilet seat.
Confirm HVAC Unit Locations: Check the planned location for both the indoor and outdoor air conditioning units. Is the outdoor unit going to be noisy outside a bedroom window? Is the indoor unit located for optimal airflow?
8. Stage 8: Insulation and Interior Wall Lining
In Brisbane’s subtropical climate, this stage is a cornerstone of long-term comfort. Correctly specified insulation reduces reliance on air conditioning. Following insulation, plasterboard is installed. The quality of the plastering directly impacts the final paint finish, creating a smooth surface ready for the interior fit-out.
Actionable Tips
Inspect Insulation Before Lining: Before the plasterboard is installed, check the insulation yourself. Look for gaps or compressed sections, as these create "thermal bridges" that reduce effectiveness. Ensure batts fit snugly between the studs.
Upgrade for Sound, Not Just Heat: Consider upgrading to acoustic insulation in the walls between living areas and bedrooms. It is a highly cost-effective way to improve privacy and reduce noise transfer.
Check Plasterboard Finish with a Light: Once the plastering is complete and sanded, inspect the walls in the late afternoon when the sun is low. This "glancing light" is ruthless at revealing any bumps, hollows, or imperfections in the finish. Mark them with painter's tape for the plasterer to fix.
Plan for Feature Walls: If you plan to have a dark or feature paint colour on a particular wall, let your builder know. They can ensure that wall receives a "Level 5" finish, which is the smoothest and most perfect plastering standard, ideal for critical surfaces.
9. Stage 9: Fit-Out and Finishing Trades
With the structural and service elements complete, the fit-out and finishing stage breathes life into the house, transforming it from a mere shell into a home. This critical phase involves installing all the visible, tactile surfaces and fixtures that define the home's character and daily usability. It’s where architectural vision meets artisan execution, covering everything from flooring and paintwork to cabinetry, tiling, and door hardware.
This stage is arguably the most aesthetically significant of all the stages of house building, as the quality of the finish directly impacts the owner's satisfaction and the home's perceived value. It requires meticulous coordination between multiple trades; joiners, painters, tilers, and flooring installers, to ensure every detail aligns with the design specifications. Precision, patience, and an unwavering eye for detail are paramount as the final layers of the home are brought to life.
Actionable Tips
Protect Finished Surfaces: As each trade finishes, ensure the surfaces they've installed are protected. This means covering new floors with cardboard or plastic sheets and protecting benchtops and bathtubs from scratches.
Check Tile Layout Before Starting: Before the tiler starts, discuss the layout. Where will the cuts be? How will the corners be finished? A good tiler will plan this to minimise visible cut tiles.
Sequence Trades Logically: Work with your builder to ensure a smart sequence. Generally, it's ceiling paint, then wall paint, then installation of flooring, then cabinetry, then benchtops, then tiling splashbacks, and finally, the fit-off of plumbing and electrical fixtures.
Plan for the Final Clean: Before handover, the site will be filled with fine dust and debris. Organising a comprehensive post-construction cleaning is crucial to ensure the property is spotless and ready for you to move in.
10. Stage 10: Final Inspections, Handover, and Defect Resolution
As construction concludes, the project enters one of the most anticipated stages of house building: the final inspections and official handover. This is the culmination of months of planning and hard work, transitioning the site from an active construction zone to a beautifully finished home. It is a meticulous process of verification, rectification, and orientation, ensuring every detail meets Australia’s stringent building codes and the homeowner's expectations.
This stage involves a final, comprehensive inspection by a licensed building certifier to confirm the home is compliant and safe for occupation, leading to the issuance of a Final Inspection Certificate. Concurrently, the builder and client conduct a detailed walk-through to identify any minor imperfections or defects. This formal handover process includes a thorough cleaning, demonstration of all home systems, and the delivery of all necessary warranties and documentation, officially marking the completion of the build.
Actionable Tips for a Smooth Handover
Create Your Own Defect List: During your walk-through, use blue painter's tape to mark any imperfections you see, a paint drip, a stiff door handle, a chipped tile. Take a photo of each one and compile your list.
Test Everything: Don't just look. Open every window, turn on every tap, flush every toilet, and flick every switch. Run the dishwasher and oven on a short cycle. It's better to find issues now than after you move in.
Request a Comprehensive Handover Pack: This pack is vital. It must include all appliance warranties, the termite protection certificate, waterproofing certificates for wet areas, and a list of key paint colours used in the house for future touch-ups.
Understand the Defect Liability Period: Under a standard QBCC contract, your builder is responsible for rectifying non-structural defects for a period of 12 months after handover. Keep a running list of any minor adjustments required as the house 'settles' during its first year.
Partnering for Success
The journey through the stages of house building is an intricate process. The key to a successful build is recognising how these phases interlink, choices made during the design phase have a direct impact on the budget and timeline of every subsequent step.
By investing time in upfront planning, maintaining open communication, and allowing a sensible contingency buffer, you shift from simply observing the construction to actively steering it.
Ready to move from planning to action? The journey is significantly smoother with an experienced design-and-construct partner. Contact Flascon Construction Group for a property assessment and discover how our integrated approach brings certainty and quality to your custom home project in Brisbane.
GET A FREE QUOTE
Ready to Explore your Property Vision?
Request a tailored quote today and discover how Flascon can deliver a bespoke build that fits your vision.
Article

